Leave Your Message

Why Is My Jonsered CS2238 Chainsaw Ignition Coil Not Working?

When a Jonsered CS2238 chainsaw refuses to start, the ignition coil is an obvious suspect. However, it is not always the real cause. A damaged spark plug, faulty stop switch, broken wire, or excessive flywheel gap can create the same symptom. The Ignition Coil Jonsered Cs2238 Chainsaw system must be checked as part of the complete ignition circuit.

A practical diagnosis begins with a cold visual inspection. Look for cracked coil insulation, loose terminals, corrosion, or a wire rubbing against the cylinder. Remove the spark plug, connect it securely to the plug boot, and ground its metal body against the engine. Pull the starter carefully. A sharp blue spark suggests the coil may still work. No visible spark requires further testing, not an immediate replacement.

Small details matter. The coil air gap should match reliable Jonsered service specifications. A thin, uneven gap can weaken ignition. The flywheel magnet should pass the coil cleanly, without scraping. Testing the stop-switch wire separately can prevent a costly mistake. One misleading clue is a spark that appears outside the engine but disappears under compression. Diagnosis is not always neat.

Use an approved spark tester and follow the manufacturer’s repair guidance. Disconnect the spark-plug lead before handling the flywheel or coil. If readings conflict, record them and repeat the test with a known-good plug. A qualified small-engine technician can confirm resistance, wiring continuity, and timing safely. Replacing parts by guesswork often wastes money and leaves the original fault unresolved.
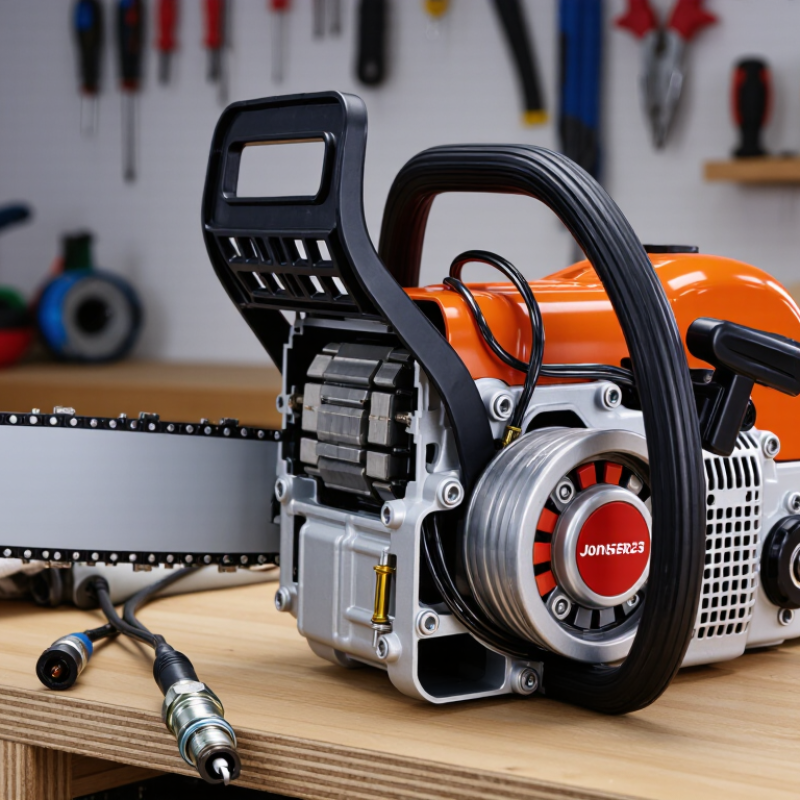
Why Is My Jonsered CS2238 Chainsaw Ignition Coil Not Working?

Understanding the Jonsered CS2238 Ignition Coil and Its Function

Understanding the ignition coil is essential when a CS2238 chainsaw will not start. This small component converts the flywheel’s magnetic energy into high voltage for the spark plug. The plug then ignites the fuel mixture inside the cylinder. Without that spark, the engine remains silent, even when fuel and compression seem normal.

In practical repairs, a failed coil is not always the real cause. A damaged plug lead, loose ground, faulty stop-switch wire, or incorrect air gap can create identical symptoms. I would inspect these areas before replacing parts. Remove the spark plug, connect it to a proper spark tester, and pull the starter while keeping fuel vapors away. A strong blue spark suggests the coil may be working. A weak orange spark needs further testing. Resistance readings can help, but they are not absolute because meters and coil temperatures vary. I have seen acceptable readings from coils that still failed under operating conditions.

Tips: Check the flywheel gap with the manufacturer’s specified gauge, not a guess. Clean rust from the magnet surface. Inspect the coil wire for brittle insulation. Disconnect the stop-switch lead briefly during diagnosis, but only when the controls and safety procedures are understood. Never hold the spark plug by hand during testing. A careful test is slower, but it prevents replacing a good coil by mistake.
Recognizing Symptoms of a Faulty Ignition Coil

Recognizing Symptoms of a Faulty Ignition Coil

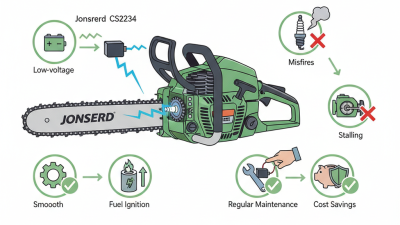
When a compact chainsaw refuses to start, the ignition coil is a logical suspect, but not always the guilty part. A failed coil may produce no spark at the plug. It can also create a thin, inconsistent spark that appears only when the engine is cold. Common signs include hard starting, sudden stalling, misfiring under load, and an engine that stops after several minutes. The plug may remain wet with fuel. That detail matters.

In workshop practice, I check the plug, plug gap, stop-switch circuit, flywheel key, and coil air gap before replacing anything. A simple spark tester is safer and more useful than holding the plug against the cylinder. A healthy ignition system normally produces a sharp blue-white spark, not a weak yellow flash. Resistance readings can help, but they do not prove a coil is good under heat or vibration. I have seen a “failed coil” diagnosis change after cleaning a corroded ground point.

The U.S. Consumer Product Safety Commission’s NEISS injury surveillance has estimated more than 30,000 chainsaw-related emergency-department injuries annually. Reliable ignition testing therefore supports both repair accuracy and safer starting procedures. NIOSH guidance also stresses maintenance, guarding, and trained operation around cutting equipment. If spark disappears only when the engine warms, repeat testing immediately after shutdown. That symptom is easy to miss. A qualified technician should confirm the result before installing a replacement part.

Checking the Spark Plug, Wiring, and Safety Controls

When a small chainsaw will not start, the ignition coil is not always the real problem. Begin with the spark plug. Remove the plug, inspect its electrode, and check for heavy carbon, cracking, or a wet fuel smell. Set the plug against clean engine metal, reconnect its lead, and pull the starter while keeping your hands away from the electrode. A clear blue spark suggests the coil may be working. No spark points toward the plug, lead, switch, or coil.

Check the wiring carefully. Look for loose terminals, crushed insulation, or corrosion near the coil and control handle. A damaged stop-switch wire can ground the ignition circuit continuously. Use a reliable multimeter and follow the manufacturer’s resistance specifications; random readings can mislead you. Disconnect the plug lead before handling the coil. Keep fuel vapors away from sparks.

Safety controls deserve equal attention. Confirm that the chain brake moves firmly and that the throttle trigger and lockout return without sticking. These controls usually affect safe operation, not spark production, but a faulty interlock can prevent starting on some designs. I have seen operators replace coils before checking a loose ground. It is an easy mistake. Inspect the air gap between the coil and flywheel with the correct gauge. Too much gap weakens ignition. Too little may cause contact. If testing feels uncertain, stop and ask a qualified small-engine technician to verify the circuit.

Testing the Ignition Coil with Basic Diagnostic Tools

Why Is My Chainsaw Ignition Coil Not Working?

Testing the ignition coil starts with simple checks, not immediate replacement. Remove the spark plug, inspect its tip, and connect it to a spark tester. Keep the tester grounded against clean engine metal. Pull the starter slowly. A strong blue spark should appear consistently. A weak yellow spark suggests trouble, but a damaged plug can create the same symptom.

Use a digital multimeter for resistance testing. Disconnect the coil wire before measuring. Check the primary winding between its terminals, then test the secondary winding through the plug lead. Compare both readings with the service manual, because acceptable values vary between engines. Infinite resistance or a sudden zero reading indicates a likely internal fault. Also inspect the stop-switch wire, coil mounting screws, and flywheel magnets. A loose ground can imitate a failed coil.

Tips: Clean rust from the mounting surface and verify the air gap with a feeler gauge. The correct gap matters. Do not hold the plug by hand during testing. I have seen a good coil blamed for a dirty connection. That mistake is easy to make. If resistance appears normal but spark remains absent, repeat the test with a known-good plug and inspect the flywheel key for damage. A multimeter cannot reveal every intermittent fault, so test the coil when cold and again after several minutes. Temperature can expose a weakness that a bench test misses.

Why Is My Chainsaw Ignition Coil Not Working? — Testing the Ignition Coil with Basic Diagnostic Tools

Diagnostic Area Basic Tool and Setup Typical Reference Reading Possible Finding Recommended Action
Visual inspection Flashlight; remove the top cover and inspect the coil, wiring, connectors, and flywheel area. No cracked insulation, loose terminals, corrosion, or visible contact damage. Damaged wire, moisture, corrosion, or a cracked coil housing can interrupt the ignition circuit. Repair the wiring or replace visibly damaged components before electrical testing.
Spark plug condition Spark-plug socket and wire brush; remove and inspect the plug. Electrode gap is commonly about 0.5 mm for small two-stroke engines; confirm the exact specification in the service information. Wet, heavily carboned, cracked, or incorrectly gapped plug may prevent reliable ignition. Clean or replace the plug and set the correct gap before condemning the coil.
Spark output test Approved spark tester connected between the plug lead and engine ground; pull the starter several times. A consistent, visible blue-white spark at every pull. No spark or an intermittent orange spark indicates a possible coil, plug lead, switch, or air-gap problem. Repeat the test with a known-good plug or tester and inspect the stop-switch circuit.
Primary winding resistance Digital multimeter on the lowest resistance range; disconnect the stop-switch wire and probe the coil primary terminal and metal core/ground. Typically a very low resistance, approximately 0.3–1.5 Ω, depending on the coil design and meter accuracy. OL or infinite resistance suggests an open primary winding; a stable near-zero reading may indicate a shorted winding. Subtract the meter lead resistance and compare the result with the exact service specification where available.
Secondary winding resistance Digital multimeter on the kΩ range; measure from the spark-plug terminal to the coil ground/core. Remove the plug cap if it is detachable. Often approximately 2–6 kΩ without the plug cap; a resistor cap may add about 5 kΩ. OL indicates an open secondary circuit; an unusually low value can indicate internal shorting. Test the plug cap and lead separately, then compare the coil reading with the specified value.
Plug cap resistance Remove the cap from the lead if possible and measure across the cap terminals. A resistor cap commonly measures about 4–6 kΩ; a non-resistor cap is close to 0 Ω. OL or a value far outside the cap rating can block or weaken the spark. Replace a defective cap and trim a small amount from the lead before refitting it securely.
Stop-switch circuit Multimeter continuity mode; disconnect the stop-switch wire from the coil and test the switch while toggling it. Run position: open circuit; stop position: continuity to ground, commonly below 1 Ω. Continuity in the run position can permanently ground the ignition and create a no-spark condition. Repair pinched wiring or replace a faulty switch; reconnect the wire after testing.
Coil air gap Non-magnetic feeler gauge; rotate the flywheel so the magnets align with the coil legs. A common small-engine reference is approximately 0.25–0.40 mm; use the engine’s specified value when available. An excessive or uneven gap can reduce magnetic coupling and produce weak or absent spark. Loosen the coil, place the gauge between the coil legs and flywheel magnets, allow the magnets to pull the coil into position, then tighten.
Flywheel magnet condition Flashlight and visual inspection; check the magnet area and flywheel key. Magnets should be firmly retained, clean, and free from cracks or heavy rust; the flywheel key should be intact. A damaged key can alter ignition timing, while a loose or damaged magnet can reduce ignition energy. Correct the mechanical fault before replacing the ignition coil.
Crank-speed check Starter-rope inspection and spark tester; verify that the engine turns freely and the starter engages normally. The flywheel should rotate smoothly and rapidly enough for the ignition module to generate a spark. A slipping starter, damaged recoil system, or unusually slow cranking can mimic a failed coil. Repair the starter or mechanical restriction and repeat the spark test.
Testing note: Resistance values are typical field references for small two-stroke ignition systems, not universal specifications. Disconnect the spark-plug lead before resistance testing, keep the chain brake engaged, and follow the exact service data for the specific engine.

Replacing and Verifying the Jonsered CS2238 Ignition Coil

A non-starting CS2238 chainsaw does not always need a new ignition coil. A damaged plug, loose ground, failed stop switch, or incorrect coil gap can produce the same symptom. The U.S. Bureau of Labor Statistics reported 1,589,100 general maintenance and repair workers in May 2023. Their data reinforces one point: accurate diagnosis requires more than replacing parts.

Remove the cover and disconnect the spark plug lead. Inspect the coil for cracks, corrosion, or a burned terminal. Test primary and secondary resistance with a digital multimeter. Use the service manual’s resistance range, because values vary by coil design. Fit the replacement coil without fully tightening its screws. Place a thin card between the coil legs and flywheel magnets. Turn the flywheel, let the magnets pull the coil into position, then tighten the screws to the specified torque. Verify the kill-switch wire is not shorting against the coil. I once replaced a coil too quickly; the real fault was a damaged stop-switch wire.

Tips: Use an approved spark tester, not your fingers. Check for a sharp blue spark while pulling the starter. A weak yellow spark suggests poor grounding, excessive air gap, or a failing coil. The U.S. EPA’s Small Off-Road Engine certification data treats handheld equipment as spark-ignition machinery, so correct ignition timing and reliable combustion matter beyond starting performance. Recheck every connection after assembly. Sometimes the overlooked detail is the fault.

Why Is My Chainsaw Ignition Coil Not Working?

Replacing and verifying an ignition coil starts with resistance testing. The chart compares generic small two-stroke ignition-system reference ranges with example workshop readings. Always confirm the exact specifications for the engine being serviced.

A primary winding reading around 0.2–2.0 Ω, a secondary winding reading around 3–15 kΩ, and a spark-plug cap reading around 3–8 kΩ are commonly used generic reference ranges. An open circuit, a short circuit, or a value far outside the applicable range can indicate a damaged coil, plug cap, or wiring connection.