A Brushcutter Ignition Coil can look sound and still fail when the engine gets hot. Before replacing it, check the spark plug, stop switch, wiring, and connectors. These simple checks help separate a faulty coil from a loose lead or a switch that is grounding the ignition circuit. “Test the circuit before you replace the part” is a useful workshop principle, though I cannot verify a named brushcutter specialist who said it. A reliable guide should not invent an expert attribution.
Work carefully. Switch off the engine, let it cool, and disconnect the spark-plug lead before inspecting components. Then use the correct service information for your model: coil resistance values and test procedures can vary. A basic spark tester can show whether the ignition produces a spark, while a multimeter can check specified resistance. Neither result should be judged without the manufacturer’s limits. A weak or absent spark is a clue, not a verdict.
This guide explains how to test a Brushcutter Ignition Coil with clear steps, practical safety checks, and common troubleshooting points. You will learn what to inspect, how to interpret test results, and when replacement makes sense. Small details matter: a cracked wire, corroded connector, or incorrect air gap can mislead a quick diagnosis. Even careful testing has limits. If results remain uncertain, pause and consult the machine’s service manual or a qualified small-engine technician.
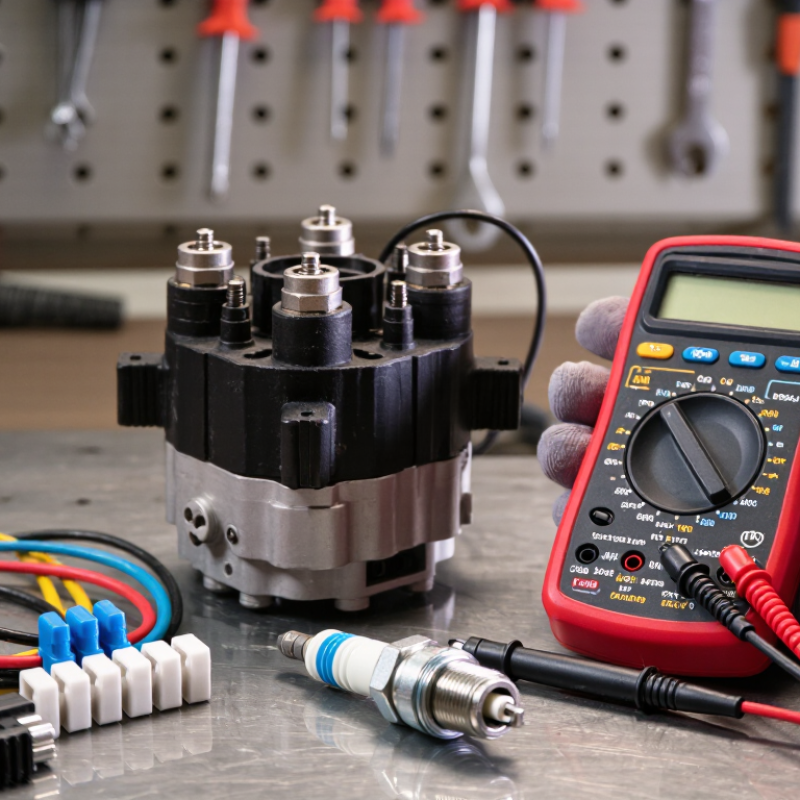
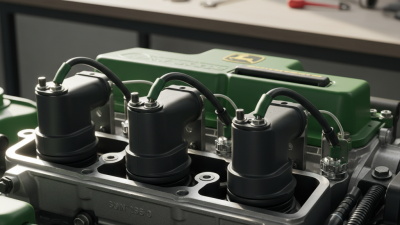
Before testing a brushcutter ignition coil, locate it beside the flywheel, beneath the engine cover. The small module has an insulated lead ending at the spark plug. Remove the plug cap only after the engine is cool. Brushcutters can start unexpectedly, so switch the ignition off, disconnect the plug lead, and keep the plug away from its socket. Work outdoors on firm, level ground. Let the machine cool fully; hot mufflers can burn skin.
Clear grass and fuel containers from the work area. Wipe dirt from the casing before opening it, so debris cannot fall into the engine. Photograph wire positions before disconnecting anything. A detail is easy to miss. The U.S. Consumer Product Safety Commission’s National Electronic Injury Surveillance System tracks emergency-room injuries involving powered outdoor equipment; its data make a practical point: preparation matters, not just the repair itself. Wear eye protection and gloves, and secure loose clothing and hair. Keep metal tools away from the battery, if fitted. Check the owner’s manual for coil location, air-gap guidance, and model-specific precautions. Ignition systems vary, so a resistance value from another engine may mislead. If fuel leaks, wiring is damaged, or the flywheel is difficult to access, stop and seek qualified service.
Before testing the ignition coil, inspect the spark plug. Remove it with the engine cool, then check for cracked porcelain, heavy deposits, or a rounded electrode. A fouled plug can mimic coil failure. Clean or replace it if needed, and set the electrode gap to the engine manual’s specification. Small differences matter. Reconnect the plug lead firmly, then use an approved inline spark tester rather than holding the plug against the engine by hand. Keep fuel vapors away and follow the equipment manual’s safety steps.
Next, examine the wiring and coil connections. Look for rubbed insulation, pinched wires, loose terminals, or corrosion near the coil. Gently move the stop-switch wire while inspecting it; intermittent contact can be easy to miss. With the ignition switched off, check that connectors seat fully and that the coil mounting faces are clean and secure. If the tester shows no spark, disconnect the stop-switch lead only as directed by the manual, then test again. A shorted switch wire may imitate a failed coil. I have seen that overlooked detail waste time. If spark returns, trace the switch circuit before using the machine. If it does not, check the specified coil gap and wiring continuity with suitable tools. Avoid guessing at measurements; a reliable service specification beats a rough estimate.
Let the engine cool, remove the spark-plug cap, and disconnect the stop-switch wire from the coil. Keep the plug lead away from metal parts. Set a multimeter to resistance, then touch its probes together. Note the lead resistance, or use the meter’s REL function if available.
Small detail, but it matters.
Check the primary winding between the coil’s low-voltage terminal and its metal ground point, following the machine’s service information. Then measure the secondary winding between the high-tension lead and ground, or between the specified terminals. Coil designs differ, so do not treat one resistance range as universal. Compare each reading with the correct service specification. An open circuit or a reading far outside that range may indicate a faulty winding. A near-zero reading can also suggest a short, though meter accuracy matters.
Resistance testing is only a clue. A coil can pass when cold and fail after the engine warms up. I have seen a steady reading create false confidence; it does not confirm strong spark under operating conditions.
Reconnect the stop-switch wire only after testing, and inspect the plug lead and connections for cracks, corrosion, or looseness.
How to Test a Brushcutter Ignition Coil?
A spark test is a practical way to check whether the ignition coil is working. Stop the engine and place the brushcutter on a stable, dry surface. Remove the spark plug carefully, then reconnect its cap to the plug. Press the metal plug body firmly against an unpainted metal part of the cylinder. This creates a safe ground path. Keep your fingers away from the electrode. Pull the starter several times and watch the gap closely. A healthy coil usually produces a clear blue or blue-white spark. A weak yellow spark may indicate a failing coil, damaged plug, poor grounding, or a loose plug cap. No spark needs further testing.
Tips: Keep fuel vapors away from the test area. Wear eye protection and use insulated pliers if available. Do not hold the spark plug by hand during testing. Check the plug gap before blaming the coil. I once found a clean-looking plug cap with internal corrosion, so visual inspection alone can mislead. Repeat the test with a known-good spark plug if the result seems uncertain. A warm coil can also fail after several minutes of operation, while testing cold. Let the unit cool, then repeat the check. If the spark remains absent, inspect the stop-switch wire, coil connections, flywheel key, and air gap according to the service manual. Resistance readings can support the diagnosis, but they should not replace a direct spark test.
| How to Test a Brushcutter Ignition Coil? - Perform a Spark Test to Verify Coil Operation | |||
|---|---|---|---|
| Test Step | Method | What to Look For | Interpretation |
| Prepare the brushcutter | Switch the engine off, allow it to cool, place it on a stable surface, and move the ignition switch to the OFF position before removing the spark plug. | The machine is stable and the cutting attachment is clear of people and objects. | Safe preparation reduces the risk of accidental starting, burns, or contact with the cutting attachment. |
| Inspect the ignition parts | Check the spark plug, plug cap, high-tension lead, and visible coil wiring for cracks, corrosion, loose connections, or damaged insulation. | No obvious damage, moisture, or loose electrical connections. | Repair damaged wiring or replace a defective plug before concluding that the coil has failed. |
| Connect an inline spark tester | Fit a suitable inline spark tester between the spark-plug lead and the spark plug, following the tester instructions. Keep the plug installed for this method. | The tester is firmly connected and the lead is routed away from hot or moving parts. | An inline tester checks for ignition pulses while keeping the spark contained in the tester. |
| Crank the engine | Set the ignition switch to RUN, engage the starting controls as specified for the machine, and pull the starter several times. | A regular, visible flash in the tester during each pull. | Regular flashes indicate that the ignition system is producing spark pulses. They do not by themselves confirm that the engine has adequate compression or fuel delivery. |
| No flash appears | Confirm the switch is in RUN, reseat the tester connections, and repeat the test. If necessary, inspect the stop-switch wire and connectors. | No flash after connections and switch position have been checked. | A grounded stop-switch circuit, damaged lead, poor connection, faulty spark plug, or failed coil may prevent spark. Isolate components using the service procedure for the specific engine. |
| Check spark-plug condition | Remove and inspect the plug after the test. Clean or replace it if it is fouled, cracked, or damaged; use the specified plug type and gap for the engine. | The electrode and insulator are intact and the gap matches the engine specification. | A defective or incorrectly gapped plug can cause starting problems even when the coil produces ignition pulses. |
| Consider coil air gap and resistance | If spark remains absent, inspect the coil-to-flywheel air gap and perform resistance checks only where the engine service information provides test points and specifications. | The air gap and measured resistance meet the applicable engine specifications. | Air-gap and resistance values vary by engine design; do not use a generic value to condemn a coil. |
| Safety and test limits | Keep hands clear of the flywheel and cutting attachment. Do not hold a bare plug lead or create an open spark near fuel, fuel vapors, or spilled fuel. | Use an insulated, purpose-made spark tester and work in a well-ventilated area away from ignition sources. | A spark test verifies spark output under the test conditions; it cannot rule out every intermittent ignition fault or other engine problem. |
How to Test a Brushcutter Ignition Coil?
A resistance reading can guide you, but it cannot tell the whole story. Remove the spark plug, ground its metal body against the engine, and pull the starter carefully. Keep your hands away from the high-voltage lead. A strong blue spark is usually a good sign. A weak yellow spark needs further investigation.
Test the coil with a reliable multimeter after disconnecting the stop-switch wire. Measure the primary and secondary windings separately. Compare both readings with the engine manufacturer’s service specifications. Resistance values vary between coil designs, so a generic internet figure may mislead you. An open circuit usually indicates a failed winding. An extremely low reading may suggest an internal short.
Check the wiring before replacing anything. Look for loose terminals, damaged insulation, corrosion, or a stop-switch wire touching ground. Inspect the plug, plug cap, and flywheel key as well. Heat can expose a fault. Test the coil when cold, then repeat after the engine warms and stops. If the spark disappears only when hot, the coil becomes a strong suspect. However, the test is not perfect. A coil may pass resistance checks and still fail under vibration or temperature. Replace it when the wiring and other ignition parts are sound, the spark remains weak or absent, and the readings fall outside specification. Record each result. That small note can prevent replacing a good coil.
The example readings show a primary winding resistance of 1.1 Ω, a secondary winding resistance of 4.2 kΩ, and a resistor spark-plug cap reading of 4.7 kΩ. These values are within common small-engine reference ranges, but the exact limits can vary by engine design.
A reading outside the expected range, an open circuit, or a weak spark across a 6–8 mm test gap can indicate a damaged coil. Always compare the results with the engine service manual before replacing the coil.